Managing and Treating Burns from a Curling Iron: A Guide
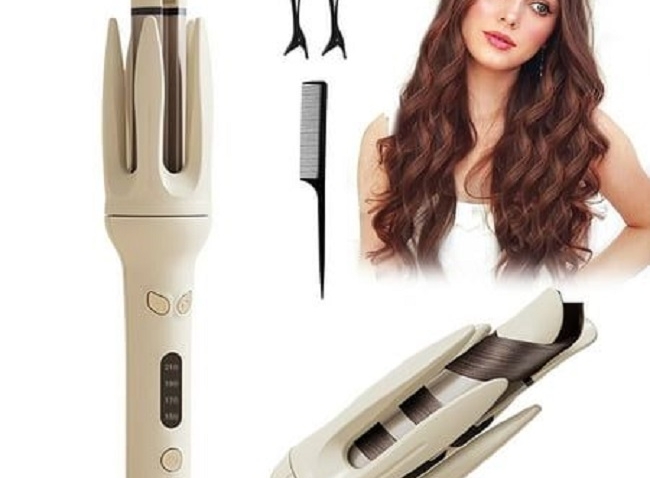
Ever achieved flawless curls only to be met with the sting of a curling iron burn? What to put on a burn from a curling iron? It happens to the best of us. In the heat of the moment, we can get a little too close, leading to a red, irritated patch of skin. But fear not, singeing sirens! With the right aftercare, you can soothe the burn and promote healing to get your skin back on track.
How to get rid of curling iron burn? This comprehensive guide will equip you with everything you need to know about how to treat burn from curling iron and how to get rid of burn from curling iron. From immediate first-aid steps to long-term scar minimization techniques, we’ll walk you through the process like a pro.
Understanding Curling Iron Burns
A curling iron burn is a type of thermal burn caused by direct contact with the hot surface of the styling tool. The severity of the burn depends on several factors, including:

- Temperature of the iron: Higher temperatures naturally cause more severe burns.
- Duration of contact: The longer the contact, the worse the burn.
- Skin sensitivity: Some individuals have more sensitive skin and are more prone to burns.
Curling iron burns typically fall into the first-degree or second-degree category:
- First-degree burns: These are the mildest type, causing redness, pain, and slight swelling. They usually heal within a week without scarring.
- Second-degree burns: These burns involve deeper skin layers, resulting in redness, blistering, and more intense pain. Healing can take several weeks and may leave some scarring.
Immediate Action: Cooling Down the Burn
The first few minutes after a curling iron burn are crucial. Here’s what to do immediately:
- Turn off the iron and unplug it: Safety first! Eliminate the heat source to prevent further damage.
- Remove any clothing or jewelry: This will prevent constriction and allow for better heat dissipation.
- Cool the burn with running water: Hold the burned area under cool (not cold) running water for 10-15 minutes. This will help to draw out the heat and reduce inflammation.
Important Tips:
- Don’t use ice: Applying ice directly to the burn can worsen the injury.
- Don’t pop blisters: Blisters form a protective barrier over the wound. Popping them increases the risk of infection.
- Don’t apply butter or oil: These can trap heat and further irritate the burn.
Soothing and Protecting the Burn
Once the burn has cooled, it’s time to focus on soothing and protecting the area:

- Clean the burn gently: Use lukewarm water and a mild, fragrance-free cleanser to remove any dirt or debris. Pat the area dry with a clean, soft cloth.
- Apply a soothing ointment: Opt for an over-the-counter antibiotic ointment like bacitracin or neosporin. This will help prevent infection and promote healing.
- Cover the burn with a sterile bandage: This will protect the wound from further irritation and keep it clean.
- Elevate the burned area if possible: This can help reduce swelling.
Additional Soothing Techniques:
- Aloe vera gel: Apply a thin layer of pure aloe vera gel to the burn for a cooling and calming effect.
- Honey: Medical-grade honey has antibacterial properties and can promote healing. However, consult your doctor before using honey on open wounds.
In 2024, with the vast array of over-the-counter pain relievers available, you can manage any discomfort associated with the burn. However, always follow the recommended dosage and consult your doctor if you have any concerns.
Long-Term Healing and Scar Minimization
As your burn heals, focus on promoting healthy skin cell regeneration and minimizing the risk of scarring:
- Keep the burn clean and moist: Change the bandage regularly and continue applying a thin layer of ointment.
- Avoid picking at scabs: Picking can disrupt healing and increase the risk of scarring.
- Moisturize the area: Once the burn has healed, use a gentle, fragrance-free moisturizer to keep the skin hydrated and supple. This can help minimize the appearance of scars.
- Sun protection is key: Sun exposure can worsen scarring. Apply sunscreen with SPF 30 or higher to the burned area whenever you go outside.
Scar Minimization Techniques:
- Silicone scar sheets: These sheets can help flatten and soften scars.
- Massage therapy: Gentle massage can improve blood circulation and promote healing, potentially reducing scar formation.
Preventing Curling Iron Burns: An Ounce of Prevention
Nobody enjoys dealing with burns, so let’s talk about how to prevent them from happening in the first place. Here are some essential tips:

- Temperature control: Always use your curling iron on a lower heat setting that’s effective for your hair type. Start with a low setting and gradually increase the heat if needed.
- Work quickly and efficiently: Don’t hold the iron on one section of hair for too long. Aim for smooth, even passes to avoid overheating any area.
- Use heat protectant spray: Apply a heat protectant spray to your hair before using any hot styling tools, including curling irons. This creates a barrier that helps shield your hair and scalp from heat damage.
- Mind your surroundings: Be aware of your surroundings while using the curling iron. Avoid distractions and make sure you have ample space to maneuver without accidentally touching yourself or others with the hot tool.
- Regular maintenance: Inspect your curling iron regularly for any damaged cords or faulty heating elements. Replace a damaged iron immediately to avoid potential accidents.
Beyond Curling Irons: Heat Styling Safety for All
Curling irons aren’t the only heat styling tools that can cause burns. Here are some general safety tips for using any hot tool:
- Read the instructions: Every hot styling tool comes with specific instructions for use. Take the time to read and understand them before using the tool.
- Never leave a hot tool unattended: Always unplug your hot tool when you’re not actively using it.
- Keep it out of reach of children and pets: Hot tools can be tempting for curious little hands and paws. Store them in a safe place where they can’t be easily accessed.
- Don’t use a hot tool on wet hair: Wet hair conducts heat more efficiently, increasing the risk of burns. Make sure your hair is completely dry before using any hot styling tool.
Curling Iron Burns and You: Addressing Common Concerns
Even with the best intentions, questions can arise when dealing with curling iron burns. Here are some commonly asked questions addressed:

- Can I put makeup on a curling iron burn?
No, it’s best to avoid applying makeup directly to the burn site. Makeup can trap bacteria and hinder healing. Once the burn has healed completely and there are no open wounds, you can resume your normal makeup routine.
- How long does it take for a curling iron burn to heal?
First-degree burns typically heal within a week, while second-degree burns can take several weeks or even months to heal completely. The healing time depends on the severity of the burn and how well you care for it.
- Will a curling iron burn leave a scar?
Minor curling iron burns (first-degree) usually don’t leave scars. However, second-degree burns with deeper tissue damage have a higher risk of scarring. Following proper aftercare and scar minimization techniques can significantly reduce the likelihood and severity of scarring.
- What if my curling iron burn gets infected?
Signs of infection include increased redness, swelling, pus formation, and fever. If you suspect an infection, consult your doctor immediately. They may prescribe antibiotics to treat the infection and prevent further complications.
Embrace Safe and Stylish Curls: Final Thoughts
Curling irons are fantastic tools for creating beautiful waves and adding volume to your hair. However, it’s crucial to prioritize safety while using them. By following the preventive measures outlined in this guide and knowing how to react if a burn occurs, you can maintain healthy, happy hair and avoid the discomfort of curling iron burns.

Remember, a little caution goes a long way in achieving stunning and safe curls. So, flaunt those gorgeous locks with confidence, knowing you’ve taken the necessary steps to prevent burns and promote healthy hair styling practices.
Soothe Your Style Worries: Conclusion
By following the tips in this guide, you can prevent curling iron burns and ensure a safe and stylish hair styling experience. But even the most careful among us can have an occasional mishap. If you do get a curling iron burn, remember to stay calm and take immediate action to cool the area and prevent further damage. With proper aftercare, you can promote healing and minimize scarring.
For any lingering concerns or if your burn seems more severe, don’t hesitate to consult your doctor. After all, healthy and happy hair starts with healthy and happy skin!


