


Six Curling Iron Techniques for Stunning Locks
Introduction to Curling Iron Styling
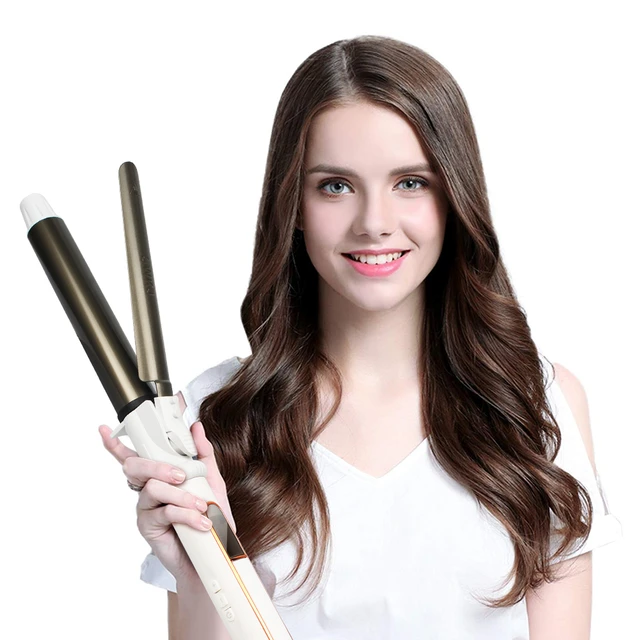
Curling irons are versatile tools for creating a range of hairstyles. From soft waves to tight spirals, curling iron techniques can transform your look. The key to success lies in understanding the various methods and recognizing which one suits your hair type and desired style.
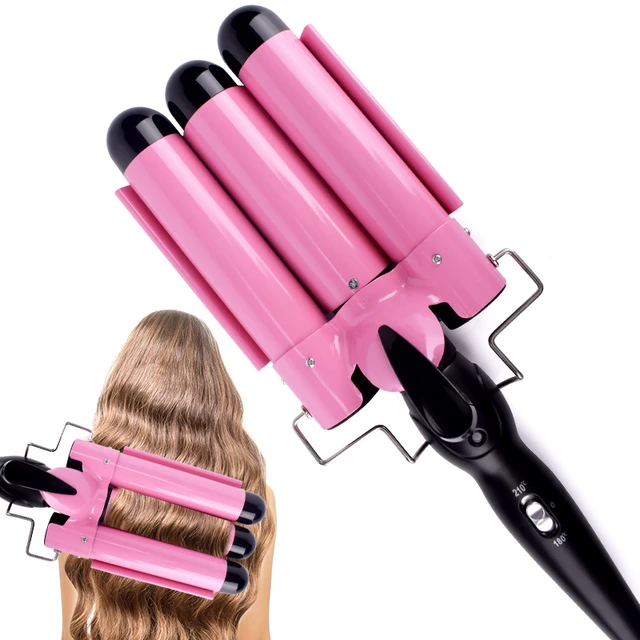
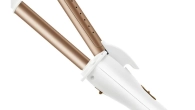
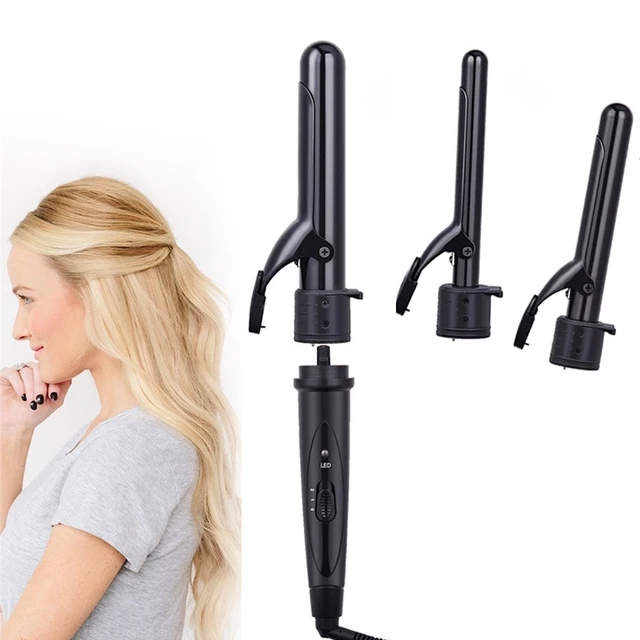
Before diving into the technique specifics, it’s essential to select the right curling iron. Consider the barrel size, as this will dictate the curl type. Smaller barrels typically produce tight curls, while larger ones create looser waves. Additionally, adjustable heat settings allow for fine-tuning based on your hair’s texture and health.
Safety is paramount, so always use a heat protectant before styling. This minimizes damage and keeps your hair looking healthy. When you’re ready to curl, practice with the iron switched off. This hones your technique without risking burns or unnecessary damage to your hair.
In the following sections, we’ll explore six transformative curling iron techniques, step-by-step. We’ll cover everything from creating classic waves to crafting modern ribbon curls with a flat iron. I’ll also share some heatless options for those looking to reduce thermal damage.
Whether you’re aiming for a casual look or sophisticated style, mastering these techniques will elevate your hair game. So let’s get started on this curling journey, ensuring each twist and turn adds flair to your hair.

Preparing Your Hair for Curling
Before you start curling your hair, proper preparation is crucial. It ensures your curls look their best and last longer. Here’s how you should prepare your hair for curling:
Choose the Right Tools
Select a curling iron that matches your desired curl size. Use a smaller barrel for tighter curls and a larger one for loose waves. Also, a flat iron can be handy for certain curl types.
Protect Your Hair
Always apply a heat protectant spray before using hot tools. This step helps prevent damage from the high temperatures.
Dry Your Hair Completely
Your hair must be dry before curling. Damp hair won’t curl well and is more prone to damage.
Detangle and Section Your Hair
Start with smooth, tangle-free hair and section it off. Smaller sections allow for even heat distribution and better control.
Practice the Technique
If you’re new to curling, practice with the iron turned off. Get comfortable with the wrapping methods needed for different curls.
By following these preparation steps, you’re setting the stage for stunning curls that hold shape and have a smooth, polished finish.
Wide and Voluminous Curls Technique
When you desire curls that make a statement, look no further than the wide and voluminous technique. This method is perfect for creating soft, yet dynamic curls that add both body and movement to your hair. Here’s how to perfect the wide and voluminous curls technique using a curling iron:
- Choose a Large Barrel: To start, opt for a curling iron with a large barrel—around 1.5 to 2 inches in diameter. The larger barrel size is the secret to wide, flowing curls.
- Heat Protectant is Key: Don’t skip the heat protectant spray—it shields your strands from damage during styling.
- Section Your Hair: Divide your hair into even sections. Larger sections result in more voluminous curls, but ensure they aren’t too thick for the iron to handle.
- Flat Wrap Your Hair: Wrap your hair flat around the curling iron’s barrel, avoiding any twists. Keep the hair in a flat, even layer to get that wide curl effect.
- Keep the Ends Free: Leaving the last 2 inches of hair out of the iron will create a more natural-looking curl and prevent damage to hair tips.
- Hold, Then Cool: Hold the wrapped hair around the iron for about 15 seconds, then release it and let it cool to set the curl shape.
- Release and Shake: After allowing your hair to cool, gently shake the curls to loosen them up, creating a more relaxed and voluminous finish.
- Finish with Hairspray: A spritz of flexible hold hairspray will help your voluminous curls maintain their shape without stiffening your hair.
By following these steps, you’ll be able to craft beautiful wide and voluminous curls that last. Remember, practice makes perfect, and regular use of these curling iron techniques will have you styling like a pro in no time.
Creating Loose Waves with a Curling Iron
For a laid-back, beachy look, loose waves are your go-to curling iron techniques. Here’s how to master this effortless style with your curling iron:
- Select the Right Barrel Size: A medium barrel, around 1 to 1.5 inches, is ideal for creating loose, flowing waves.
- Apply Heat Protectant: Always start by spritzing your hair with a quality heat protectant. This reduces potential damage.
- Section for Control: Separate your hair into manageable sections. Smaller ones work well for even curls; larger for more loose waves.
- Wrap Hair Gently: Take a section and wrap it around the iron. Start from the mid-lengths and avoid curling the very ends.
- Let Hair Heat: Keep the hair around the iron for roughly 10 to 15 seconds. This time frame usually works well.
- Unwind for Waves: Gently release the hair from the iron to avoid disrupting the wave’s shape.
- Cool Down: Allow your waves to cool. This helps them set properly and last longer.
- Use Fingers to Style: Run your fingers through the waves to separate and soften them.
- Finish with Spray: A light mist of flexible hairspray can help hold the waves without stiffness.
Creating loose waves doesn’t have to be tricky. With a good curling iron and some practice, you can achieve salon-worthy results at home. Keep your movements soft and steady for the best outcome. Happy styling!
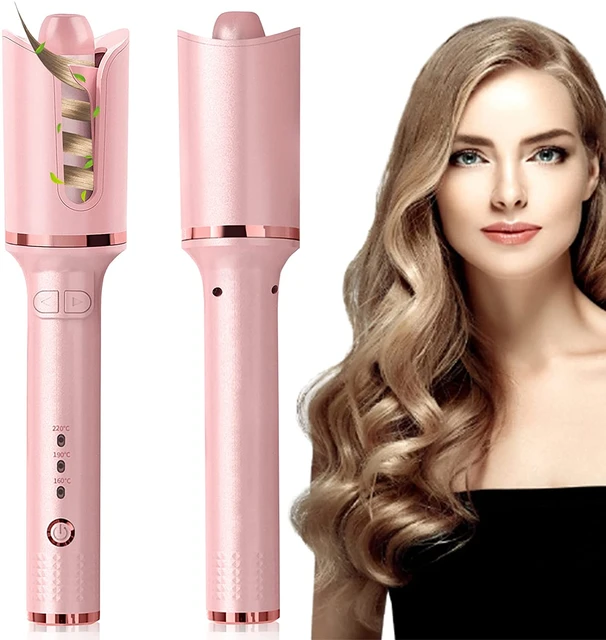
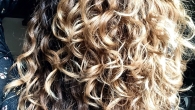
Achieving Spiral Curls Using a Curling Iron
For tight, springy curls, spiral curls are the ideal style. Here’s a simple guide to mastering this technique with your curling iron:
- Opt for a Smaller Barrel: A slim barrel curling iron, about 1 inch in diameter, works best for tight spirals.
- Protect Your Hair: Apply a heat protectant spray before you start to safeguard your locks from damage.
- Section Your Hair: Split your hair into small, even sections. Smaller sections help create more defined spirals.
- Twist and Wrap: Twist each section before wrapping it around the curling iron. This creates the spiral effect.
- Watch the Heat: Hold the curl for about 10 seconds, avoiding overheating which can harm your hair.
- Release with Care: Gently unwind the curl from the iron to maintain the spiral shape.
- Let Curls Set: After curling, don’t touch the spirals right away. Let them cool to set the pattern.
- Soft Finish: Once cool, lightly separate the curls with your fingertips for a softer look.
- Final Hold: Lightly mist with hairspray to keep your spirals in place all day.
With these steps, you can achieve beautiful spiral curls that add texture and volume to your hair. Remember to practice the technique and use the right tools for the best results.

Techniques for Ribbon Curls with a Flat Iron
To make ribbon curls using a flat iron, follow these simple steps:
- Choose the Right Iron: A professional flat iron works best for this technique. It should have smooth plates.
- Protect from Heat: Always use a heat protectant spray to shield your hair from damage.
- Work in Sections: Divide your hair into 1-inch sections for control and even curling.
- Start at the Base: Clamp the flat iron near the roots and twist it half a turn.
- Glide and Rotate: Slowly slide the iron down the section while maintaining the half-turn.
- Cool Curls: After releasing the hair, let the curls cool to set the shape.
- Shake for Volume: Gently shake out the curls with your fingers to add volume.
- Set with Spray: Apply a flexible hold hairspray to help your ribbon curls last longer.
Practice makes perfect when it comes to using a flat iron for curls. With these steps, you can create tight, bouncy ribbon curls that last. Don’t be discouraged if it takes a few tries to get it right. Keep practicing for beautiful results.
Creating S Waves with a Flat Iron
Transform your straight locks into chic, flowing S waves using a flat iron. Here’s a simple step-by-step guide:
- Prep with Heat Protectant: Start by spraying a heat protectant to shield your hair from high temperatures.
- Section Your Hair: Work with small sections, about one to two inches wide, for better control.
- Start Near the Roots: Pinch each section near the roots between your fingers.
- Form the S Wave: Push the hair into an ‘S’ shape, clamp with the flat iron, then gently tap down.
- Repeat the Pattern: Move the flat iron down the section, alternating the ‘S’ shape’s direction.
- Let it Cool: After styling, allow your hair to cool before touching to set the waves.
- Finger Comb: Use your fingers to gently separate and soften the waves for a natural finish.
- Set with Spray: Spritz a light hold hairspray to keep the waves in place without stiffness.
This technique requires practice, but once mastered, it gives you a soft, natural look. Start slow and be patient for the best waves.
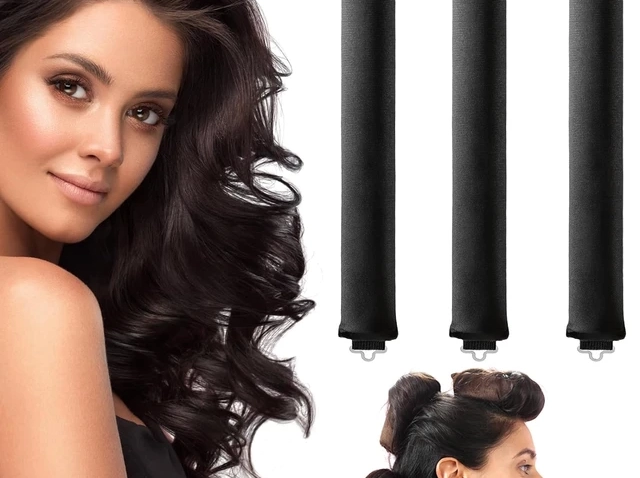
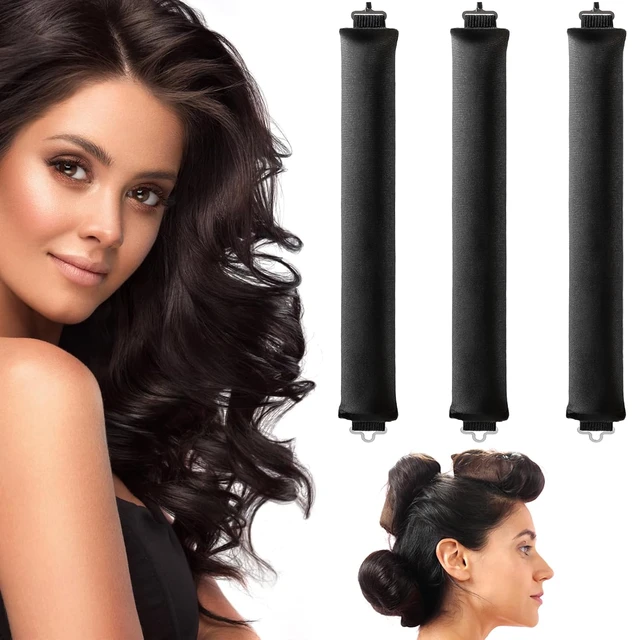
Heatless Curling Alternatives
Turning to heatless methods to curl hair is ideal for reducing damage and breakage. Heatless curling iron techniques often hinge on setting the hair to dry into a desired shape. They are also fantastic for those with hair that is sensitive to heat or recovering from styling damage. Here are several no-heat curling methods to consider:
Braiding for Waves
Start with damp hair and braid it before bedtime. The number of braids can vary depending on the wave tightness you desire. Remove the braids in the morning for soft waves.
Headband Curls
Wrap damp hair around a soft headband worn across the forehead. In the morning, unravel for gentle, voluminous curls.
Twist and Pin
Twist small sections of damp hair and pin them up with bobby pins. After drying, you’ll have natural, bouncy curls.
Sock or Rag Curls
Cut clean socks or rags into strips. Roll damp hair sections up with these and tie them off. Once dry, enjoy springy curls.
Flexible Foam Rollers
Use foam rollers on damp hair and sleep with them overnight. They create defined curls without discomfort.
These heatless curling alternatives work well for various hair types. They require time, as the hair must dry to set the curls, but they greatly reduce the risk of heat damage. Rotate between these options to find the best fit for your hair and desired style.
 Tips for Long-Lasting Curls
Creating stunning curls is one thing, but ensuring they last all day is another. Here are tips to make your curls endure from morning to night:
Start with Healthy Hair
Healthy hair retains styles better. Trim split ends and use moisturizing treatments regularly.
Use the Right Products
Before styling, apply mousse or curl-enhancing products. They provide hold and definition.
Cool Down
After curling, let your curls cool before touching them. This sets the shape.
Avoid Humidity
Humidity can make curls fall. Use anti-humidity spray or hairspray to combat this.
Skip the Brush
Don’t brush your curls. It can make them fall out. Use fingers to style.
Refresh with Dry Shampoo
To add volume and absorb oil, use dry shampoo. It revives curls too.
Touch-Up Sparingly
If needed, touch-up curls with a curling iron. But don’t overdo it.
Sleep Smart
At night, pin curls up or use a silk scarf. This prevents them from flattening.
By following these simple guidelines, your beautiful curls are more likely to withstand the hustle of your day. Remember, less is often more when it comes to maintaining your curls.
Conclusion: curling iron techniques
To perfect your curling iron techniques, you need practice and patience. Stick with it, and you’ll find your rhythm. Use this guide as a starting point, and don’t be afraid to experiment. Try different barrel sizes and methods to see what works for your hair type and desired look. Always remember to protect your hair with a heat protectant before curling, and let curls cool to set. Switch up your style with heatless methods when you can to keep your hair healthy. And most importantly, enjoy the process of creating new looks. Your perfect curls are waiting just around the corner!