


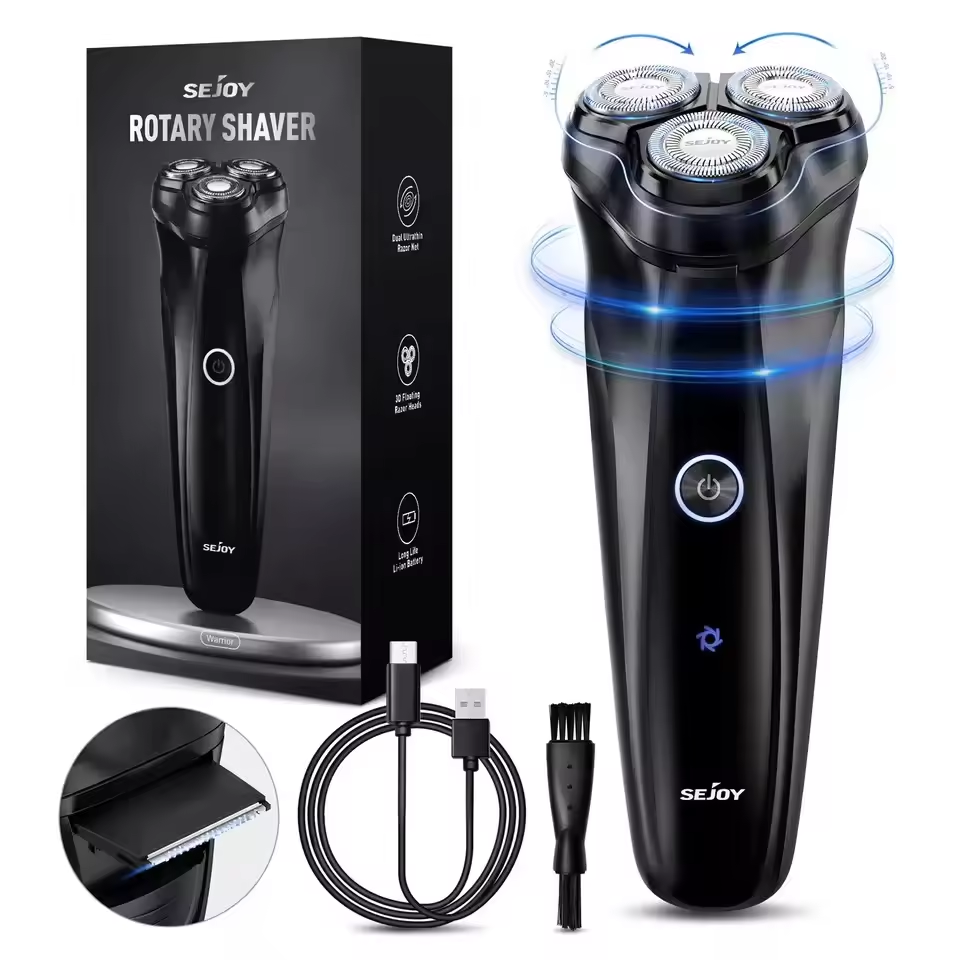
How to Clean Electric Shaver: Step-by-Step Guide
Introduction to Electric Shaver Maintenance
Maintaining your electric shaver is key to its performance and longevity. Like any device, it needs regular care to function at its best. In this guide, we’ll walk you through how to clean your electric shaver effectively, ensuring a closer, more comfortable shave every time. Cleaning isn’t just about aesthetics; it prevents the build-up of hair, skin cells, and product residue, which can dull the blades and reduce efficiency. With the right cleaning routine, you can keep your shaver in top condition, giving you excellent performance shave after shave.
Why Regular Cleaning is Crucial for Shaver Performance
Regular cleaning of your electric shaver is not just a suggestion, it’s a necessity. Here are key reasons why keeping your device clean is essential for optimal performance.
- Preserves Blade Sharpness: Hair and skin residue can quickly dull your shaver’s blades. Cleaning removes these particles and maintains the sharpness required for a smooth shave.
- Ensures Consistent Shaving: A dirty shaver might pull or tug on hairs, leading to an uneven shave. Regular cleaning ensures each use is comfortable and even.
- Prevents Skin Irritations: Leftover debris on shaver heads can cause skin irritation or infections. A clean shaver is a safer shaver.
- Enhances Shaver Efficiency: A clogged shaver works harder, which can reduce its lifespan. Cleaning helps your shaver run efficiently.
- Reduces Noise Levels: Accumulated gunk inside the shaver can make it noisier. Regular cleaning keeps it operating quietly.
- Saves Battery Life: An overworked electric shaver due to clogging drains the battery faster. Keep it clean to ensure optimal battery performance.
- Avoids Costly Repairs: Over time, the buildup might damage the shaver’s components. Regular cleaning can prevent the need for repairs or replacements.
By understanding how to clean electric shavers effectively, and making it a part of your routine, you’ll ensure your shaver remains a reliable grooming companion.
Step-by-Step Cleaning Routine
Keeping your electric shaver clean is simple if you follow these easy steps. Start with these practices immediately after each shave to maintain your device’s peak performance.
- Turn Off and Disconnect: Safety comes first. Always turn off and unplug your shaver before cleaning.
- Open the Shaver Head: Most models will have a button or mechanism to release the shaver head. Open it to expose the blades.
- Remove Loose Hairs: Tap the shaver gently over a sink to dislodge any loose hairs or debris.
- Use the Cleaning Brush: Use the brush provided with your shaver to sweep away any remaining particles. Careful strokes will avoid damage to the blades.
- Rinse with Water: If your shaver is waterproof, rinse the head under running water. Non-waterproof models may need a damp cloth instead.
- Apply Cleaning Solution: A few drops of cleaning solution can help remove stubborn grime. Ensure it’s compatible with your shaver.
- Dry Thoroughly: Shake off excess water and let the shaver head air-dry completely. Moisture can lead to rust or mold.
- Reassemble: Once dry, put the shaver head back together. Make sure all parts click securely into place.
- Lubricate the Blades: A drop of lubricant can keep the blades sharp and moving smoothly. Do not overdo it; a little goes a long way.
- Charge as Needed: After reassembly, charge your shaver if it’s running low. This ensures it’s ready for your next use.
Remember to incorporate this routine on how to clean your electric shaver after each use for the best results. Regular maintenance will lead to a more comfortable shave and a longer-lasting shaver.
Cleaning Agents and Tools for Electric Shavers
Choosing the right cleaning agents and tools is crucial for an effective electric shaver cleaning routine. To achieve the best results and prevent damage to your shaver, you should use the following:
- Cleaning Brushes: Each electric shaver usually comes with a dedicated cleaning brush. Use it to gently remove hair and debris from the blades and foil heads.
- Cleaning Solutions: Specialized cleaning solutions designed for electric shavers can help dissolve stubborn residue. Always verify that the solution is compatible with your model.
- Microfiber Cloths: Soft microfiber cloths can wipe the shaver body without scratching the surface. They are also great for drying after rinsing.
- Lubricating Oil: A few drops of lubricant on the blades after cleaning will keep the moving parts working smoothly. Be sure to use oil intended for shavers.
- Waterproof Shavers: For those with waterproof shavers, warm water can be used to rinse away grime effortlessly. Just be sure your shaver is indeed waterproof before doing this.
- Distilled Water: If you live in a hard water area, use distilled water to avoid mineral buildup inside the shaver.
- Air Duster: An air duster can blast away tiny particles from nooks and crannies, especially ones that are hard to reach with a brush.
By using these tools and cleaning agents appropriately, you can learn how to clean your electric shaver with ease and maintain its performance. Make sure to gently use these tools to avoid causing any damage to your shaver.
Maintenance Tips to Prolong Shaver Life
To keep your electric shaver in top shape for years, follow these maintenance tips:
- Clean After Each Use: Make it a habit to clean your shaver after every shave. This prevents the build-up of residues.
- Replace Parts as Needed: Change out the shaver’s blades and foils as recommended by the manufacturer to ensure optimal performance.
- Store Properly: Keep your shaver in a dry place away from direct sunlight. Use a protective case if available.
- Avoid Drops: Handle your shaver with care. Dropping it can damage internal components and the exterior.
- Check for Wear: Regularly inspect your shaver for signs of wear and tear. Address issues immediately to prevent further damage.
- Charge as Directed: Follow the manufacturer’s instructions on charging. Overcharging or letting the battery fully deplete can reduce its lifespan.
- Keep it Dry: Even if your shaver is waterproof, don’t leave it in wet areas. Dry it off after cleaning to prevent corrosion.
- Use the Right Accessories: Stick to accessories and parts made for your specific shaver model to avoid any compatibility issues.
By following these easy maintenance tips, you help ensure that your electric shaver delivers a smooth, efficient shave every time. Regular maintenance leads to longevity and reliability from your electric shaver.
Common Mistakes to Avoid When Cleaning Your Electric Shaver
Learning how to clean your electric shaver is essential, but it’s just as important to know what not to do. Avoiding common cleaning mistakes can save you from unnecessary wear and tear or even damage to your device. Here are some mistakes you should steer clear of to keep your shaver in pristine condition.
- Ignoring Manufacturer’s Instructions: Always read the manual. Each shaver has its specific do’s and don’ts.
- Using Harsh Chemicals: Stick to solutions made for electric shavers. Other chemicals might harm the device.
- Not Drying Completely: Moisture causes rust and mold. Ensure the shaver dries fully before reassembling.
- Overlooking the Replacement of Parts: Dull blades and old foils affect performance. Replace them as advised.
- Rinsing Non-Waterproof Shavers: Never rinse these under water. It could lead to electrical failure.
- Forgetting to Lubricate: Lubrication after cleaning maintains blade efficiency. Don’t skip this step.
- Being Rough with the Blades: Use gentle strokes when cleaning. Rough handling can damage the blades.
- Storing the Shaver Improperly: After cleaning, store it in a dry place. Avoid areas where it may fall or get crushed.
By keeping these points in mind and integrating them into your electric shaver cleaning routine, you’ll avoid common pitfalls that could lead to a less efficient shave or a shorter lifespan for your shaver. Remember that regular maintenance, along with correct cleaning practices, is the key to a durable and reliable electric shaver.
Troubleshooting Common Shaver Cleaning Problems
Despite your best efforts, you might encounter issues when cleaning your electric shaver. Understanding common problems helps you resolve them quickly. Let’s look at some troubleshooting tips.
Shaver Not Turning On After Cleaning
If your shaver won’t start after cleaning, check the following:
- Ensure it’s fully dry before you try to power it on.
- Confirm that the shaver is properly assembled.
- Check the battery’s charge level.
- Inspect the power cord and outlet for any issues.
Residue Build-Up Despite Regular Cleaning
Sometimes, you follow all steps on how to clean electric shavers, but residue persists.
- Use a cleaning solution designed for electric shavers.
- Soak the head in warm soapy water, for waterproof models.
- Consider using a soft toothbrush for stubborn build-up.
Blades Remain Dull After Cleaning
Dull blades can occur even with regular cleaning. Here are tips to help:
- Replace the blades or foil if they are beyond their life cycle.
- Use the correct lubricant to maintain blade function.
- Do not use too much pressure when cleaning as it can damage the blades.
Shaver Seems Noisier After Cleaning
A noisy shaver can be frustrating. To fix this:
- Check for loose parts or signs of damage.
- Lubricate the moving parts as per the manufacturer’s guidance.
- Revisit the cleaning routine to ensure no debris is left inside.
These troubleshooting steps should help you handle common electric shaver cleaning problems. Regular maintenance and correct cleaning techniques can prevent many issues. Always refer to the manufacturer’s instructions and use tools and solutions compatible with your specific model. Addressing cleaning problems early on ensures your shaver operates at its best, for a comfortable and efficient shaving experience.
Conclusion: The Importance of Keeping Your Shaver Clean
Cleaning your electric shaver is not just a small part of its care – it’s essential. This guide has shown you how to clean electric shavers step by step. Remember, a clean shaver leads to a better shave and fewer skin problems. It also keeps the shaver running smoothly and quietly, saving you money on repairs. But don’t just clean. Follow the whole maintenance guide, use the right tools, and avoid common mistakes. Keep your shaver dry and charged, and it will last for years. Tailoring your cleaning routine to your shaver’s needs will keep it in prime condition. This way, each shave will be as close and comfortable as the first one.