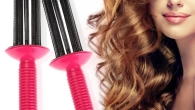


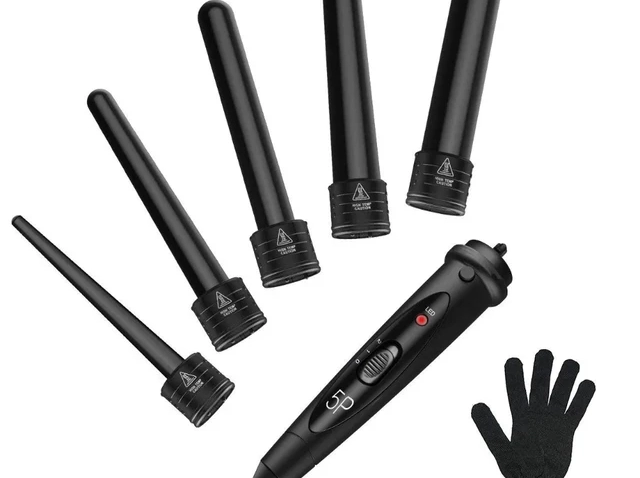
Mastering the Art of Styling: How to Use a 3 Barrel Curling Iron
Introduction
Creating beautiful waves and curls in your hair is made easy with a 3 barrel curling iron. This innovative styling tool allows you to achieve effortless and voluminous waves that can transform your hairstyle. Understanding the proper technique and following step-by-step instructions is crucial for achieving stunning results while keeping your hair safe from heat damage. In this comprehensive guide, we will explore how to use a 3 barrel curling iron effectively. From preparing your hair to the proper barrel technique and finishing touches, we will provide specific instructions to help you master the art of 3 barrel curling and achieve glamorous waves or curls.
Mastering the Art of Styling: How to Use a 3 Barrel Curling Iron
I. Preparing Your Hair
Prepare your hair properly for optimal styling results:
-
Clean and Dry:
- Begin with clean, dry hair. Wash and condition your hair prior to styling, and ensure it is completely dry before starting the curling process. Damp hair can result in uneven or ineffective curling.
-
Protect with Heat Spray:
- Apply a heat protectant spray or serum to protect your hair from heat damage. This will provide a barrier between the heat of the curling iron and your hair, minimizing potential harm.
-
Section Your Hair:
- Divide your hair into manageable sections using clips or hair ties. This makes the curling process easier and ensures more consistent results. Start with the lower layers and work your way up to the top of your head.
II. Setting the Temperature
Determine the appropriate temperature for your hair type:
-
Fine or Thin Hair:
- Set the curling iron to a lower temperature, around 300-350°F (150-175°C), to prevent potential damage to fine or thin hair.
-
Normal or Medium Hair:
- Use a medium temperature setting, approximately 350-375°F (175-190°C), for normal or medium hair. This range allows for effective curling while minimizing heat exposure.
-
Thick or Coarse Hair:
- If you have thick or coarse hair, opt for a higher temperature setting between 375-400°F (190-200°C). This allows for adequate heat distribution, ensuring long-lasting curls.

III. Curling Technique
Follow these steps for a flawless curling technique:
-
Heat Up the Curling Iron:
- Plug in the 3 barrel curling iron and allow it to heat up to your desired temperature. Follow the manufacturer’s instructions for heating time and temperature settings.
-
Grab a Section of Hair:
- Release a section of hair from the clipped or tied portions. The width of the section depends on the desired curl size. For tighter curls, use smaller sections, while larger sections create more relaxed waves.
-
Prep the Hair Section:
- Comb through the section of hair to remove any tangles or knots. Applying a light holding spray or mousse can help the curls hold better and last longer.
-
Position the Curling Iron:
- Hold the curling iron with the barrels facing downward. Place the middle section of your hair between the two outer barrels, positioning the iron as close to the roots as desired.
-
Clamp and Hold:
- Close the curling iron clamps gently but firmly, holding the hair in place for about 5-10 seconds. The duration may vary based on your hair type and desired curl intensity.
-
Release and Repeat:
- Release the clamps and carefully remove the curling iron from the hair section. Repeat steps 3-6 throughout your hair, working methodically from the bottom layers to the top.
IV. Styling Tips
Consider these additional tips for flawless results:
-
Varied Directions:
- Alternate the direction of the curling iron barrels with each section for a more natural and voluminous look. Curl some sections away from the face and others toward the face to create depth and dimension.
-
Finger Comb or Use a Wide-Toothed Comb:
- Once all the sections are curled, use your fingers or a wide-toothed comb to gently comb through the curls. This will soften and separate the curls for a more effortless look.
-
Finishing Products:
- Apply a small amount of lightweight hairspray or texturizing spray to hold the curls in place. Be careful not to overload the hair with product, as this can weigh down the curls and make them less bouncy.
V. Aftercare and Maintenance
Take care of your curls and the styling tool:
-
Protect Your Hair:
- Avoid using excessive heat styling tools or exposing your hair to unnecessary heat between styling sessions. Opt for heatless styling techniques to preserve the health of your hair.
-
Clean the Curling Iron:
- Allow the curling iron to cool completely before cleaning. Gently wipe the barrels with a soft cloth or cotton pad dipped in rubbing alcohol to remove any product residue. Ensure the curling iron is unplugged and switched off before cleaning.
-
Store Safely:
- Once the curling iron is clean and cool, store it in a heat-resistant pouch or holder to protect it from damage and prevent accidents.
VI. Experiment and Have Fun
Once you have mastered the basic technique, feel free to experiment with different curl sizes, directions, and styles. Try curling only the ends of your hair for a beachy look, or create tighter curls for a more defined style. Don’t be afraid to play around and find the looks that suit your personal style and preferences.
VIII. Troubleshooting and Common Challenges
While using a 3 barrel curling iron is generally straightforward, you may encounter some challenges along the way. Here are common issues and tips for troubleshooting:
-
Uneven Curls:
- If you notice that your curls are coming out uneven or inconsistent, double-check your technique. Make sure you’re using consistent tension and timing for each curl. You may also need to adjust the section size or the temperature to achieve more consistent results.
-
Heat Damage:
- If your hair feels excessively dry or damaged after curling, it’s essential to reassess your temperature settings. Lower the temperature if you notice signs of heat damage, such as split ends or brittle hair. Additionally, always use a heat protectant spray or serum before curling to minimize heat damage.
-
Curl Release Issues:
- If you’re struggling to release the curled hair from the iron, make sure you’re not clamping the hair too tight. Also, check that the sections are not too large or tangled, as this can cause difficulties in releasing the curls. Adjusting your technique and sectioning may resolve this issue.
-
Frizz or Lack of Hold:
- If your curls lack hold or appear frizzy, it could be due to excessive humidity or product buildup. Consider using a lightweight hairspray or anti-frizz product to enhance the longevity and smoothness of your curls. Applying a small amount of serum or oil to the ends after styling can also help combat frizz.

VII. Conclusion: Embrace Gorgeous Waves and Curls
By following these step-by-step instructions, you can master the art of using a 3 barrel curling iron and achieve stunning waves or curls. Preparation, the right temperature, and proper technique are key to attaining flawless results. Remember to protect your hair with a heat protectant, section it properly, and adjust the curling iron temperature to your hair type.
With practice, patience, and creativity, you can effortlessly style your hair into glamorous waves or curls. Enjoy the versatility and beauty of your newly mastered 3 barrel curling iron and rock stunning hairstyles with confidence.